Wednesday 27 May 2015

Barbecued Mackerel with Ginger, Chilli and Lime and Grilled Asparagus

Barbecued Mackerel with Asparagus

After not having enough Asparagus last year, I have maybe gone out of my way to ensure I get some every weekend this season.  But I also really wanted to utilise my barbecue on another semi-fine day, so decided to try and do some mackerel.  So far, the only time I've cooked fish on my Weber is either in a paella, or using fillets on a cedar plank, but this time, I wanted to try and do a whole fish, straight on the grill, using direct cooking.  I'm far more comfortable with more slow cooked barbecue stuff, although using my phone for a count-down timer, I've got better at not overcooking things that just need minutes and seconds, or at least need to be checked every couple of minutes.

I'm not sure I've ever cooked a whole fish before, be it on the barbecue or anywhere else.  I normally get my fish filleted, or when I have cooked something with bones in, it hasn't been the entire fish.  But, having read up on a number of mackerel recipes done straight on the grill, I thought it was about time I gave it a try, especially as it's cheap enough that if I messed it up first time around, I could easily go out of buy a couple more to try again.

A number of places talk about having your grill squeaky clean to do this.  I'm guessing this is for people that don't use their grill much.  Personally, I clean my grill by getting some hot coals under it, closing the lid for 15 minutes or so, then giving it a good brushing with a decent, wire grill brush.  I'm sure a perfectly new, squeaky clean grill will work really well, but it doesn't have the character of one that shows real use.  It's like woks.  The blacker the wok, the better the chef.  But like also like woks, just because it's black, it doesn't mean it should have large amounts of grease, and leftover foodstuff hanging to it.

This recipe was good for two Whole Mackerel, a really good value, but nice meal for two.

Recipe for the Marinade

  • 3-4 tablespoons Olive Oil
  • 1 Lime (zest and juice)
  • 1 Red Chilli (finely chopped)
  • 1 thumb of Ginger (finely chopped or grated)
  • 1-2 cloves of Garlic (crushed)
  • 2 teaspoons of Honey
  • 1 tablespoon Fish Sauce

Recipe for the Grilled Asparagus

  • 12 or so big, thick pieces of local Asparagus (if it's too thin, it will cook too quickly on the grill)
  • 1 tablespoon of Olive Oil
  • Salt and Fresh Ground Black Pepper

Mix all the marinade ingredients together.  Adjust amount of lime, honey and fish sauce to taste.  If too salty, add a little more lime juice.  If too sour, add a little more honey.  Balance to taste.  Maybe add some finely chopped Fresh Parsley too.

Make 6 deep slits on both sides of the Mackerel with a sharp knife.  Massage the marinade all over the fish, into the slits and the body cavity.  Wrap them in cling film, and keep in the fridge for 20 minutes or so while you get your barbecue going.  Keep any remaining marinade to drizzle over the Mackerel after grilling.

Cut away any woody bit at the end of the Asparagus.  If it's in season, fresh and local, there shouldn't be much to cut away at the base.  Rub in Olive Oil, then season with Salt and Fresh Ground Black Pepper.  Keep aside to grill towards the end of the Mackerel cooking, or while the Mackerel is resting.  

Get your barbecue (grill) ready for moderate direct cooking.  Depending on your lighting method, this could take about 40-45 minutes to get the coals to their optimum.  Ensure your grill is as clean as possible.  A lidded barbecue (such as a Weber kettle barbecue) helps to ensure coals don’t flame up too much as the marinade and oil drips from the fish.

Place the fish on the grill for 5-6 minutes per side, only moving when turning over.  When done, the eyes should look milky and the middle of the fish should be warm (about 52-55°C near the spine with an instant read thermometer, or fairly warm, but not burning to the touch). Leave to rest for 2-3 minutes.

While the fish is resting, grill the Asparagus, turning fairly frequently.  Again, use the lid to calm any flames from small amounts of Olive Oil dripping on the coals.

Serve the Mackerel with the Asparagus, drizzling any remaining marinade over the fish.


Tuesday 1 July 2014

Packer Cut Brisket, Low and Slow


I've done a few briskets on the barbecue the last year or so, but being in the UK, the brisket cut we get isn't the same as the one we see of all these US based pit-masters smoking.  When I get a brisket from my local Irish butcher, it generally comes with bones (which are useful for stock), and is a totally different shape to those I see on US barbecue websites.  A quick scout for the wikipedia entry on brisket shows why.

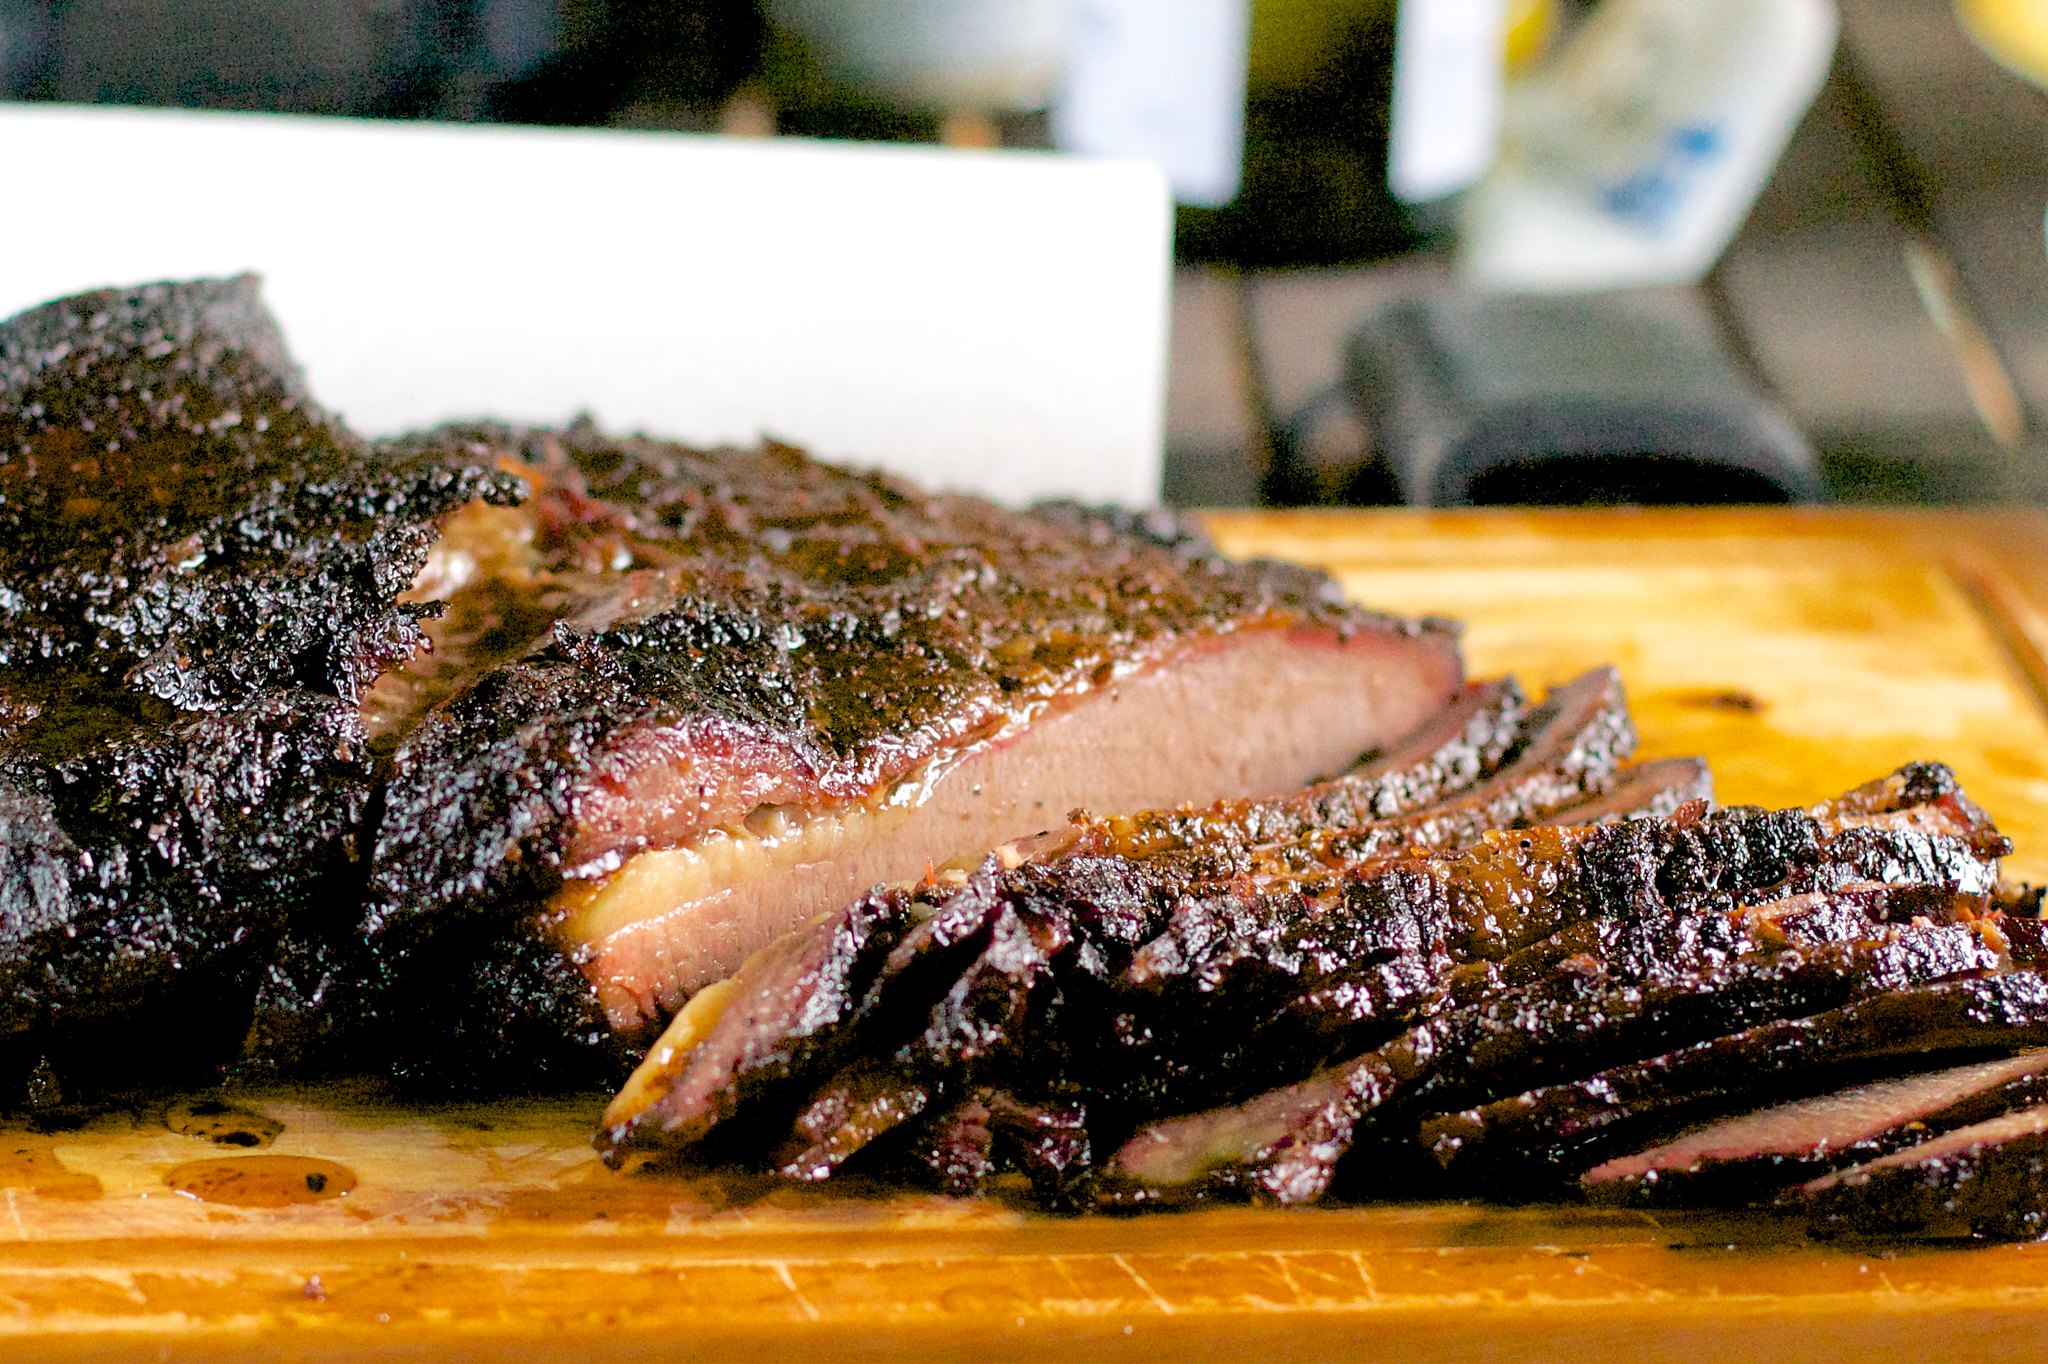
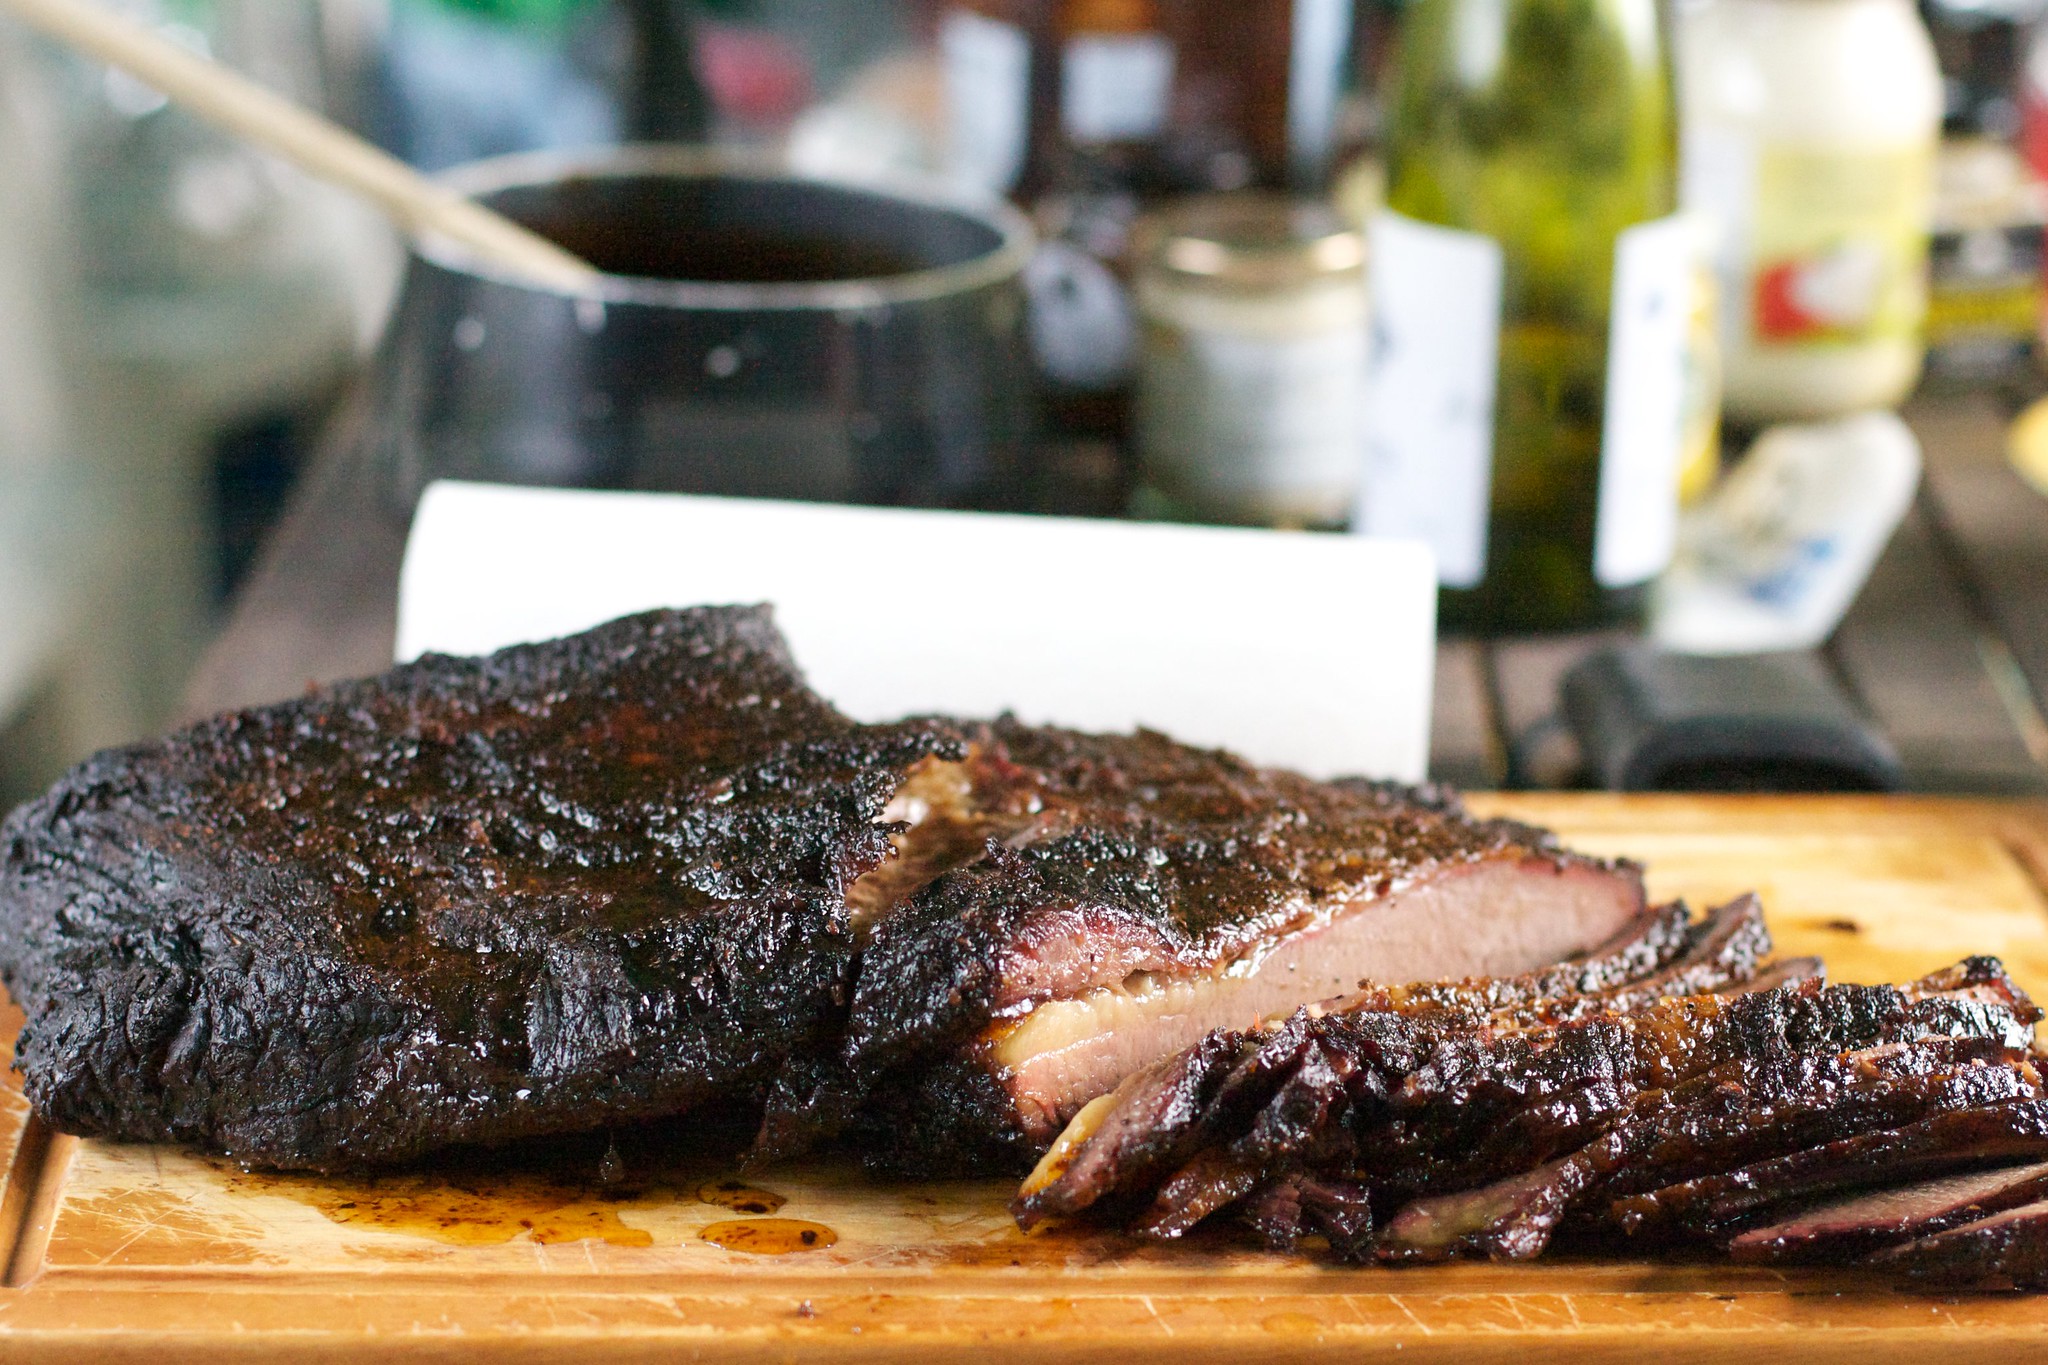
However, there is at least one butcher in London that will sell a really nice quality Packer Cut Brisket, and for this particular barbecue, I went to Turner & George.  The 6.425kg hunk of beef that arrived early Friday morning was something to behold.


The photos just don't do it justice (plus I should've also taken a few shots of the other side).  A lovely, properly aged, piece of brisket, just needing trimming and rubbing, leaving for about 12 hours,  and then putting onto the Weber, for another 12 or so hours.  I thought about injecting Veal Stock into it, but once I realised that I'd run out of stock anyway, I decided to just to let the meat speak for itself.

Rub Recipe


  • 50g Maldon Sea Salt
  • 25g Light Muscavado Sugar
  • 15g Black Pepper
  • 10g Whole Chipotle
  • 5g Smoked Paprika
  • 5g English Mustard Powder

Put into a spice blender and blend until powdered.

Smoked Brisket Recipe (Serves 8-12)


  • 1 Packer Cut Brisket (around 6kg)
  • 1 Portion of Rub
  • 2 Tablespoons of Light Rapeseed Oil
  • Long-Lasting Charcoal Briquettes
  • Mesquite Chunks
  • Remote Thermometer
  • Kettle Barbecue or other Smoker


Trim your brisket to get rid of some of the excess fat.  There are many videos on Youtube showing how to do this.  Depending on where you get yours from, there may be more or less to trim off.  If it's not an aged piece of brisket, probably leave more fat on, to help maintain moisture.  Once trimmed, rub the meat in the Light Rapeseed Oil, and apply the rub liberally all over the meat.  Wrap the meat in cling film and leave in the fridge for a few hours at least.  Remove the meat from the fridge an hour or two before you intend to start smoking.

If you're using a Kettle Barbecue, try arranging your coals using the "Snake Method", with chunks of Mesquite lined side by side on top of the unlit coals to last for the first 5-6 hours of cooking (half a dozen fist sized pieces perhaps).  Put a drip tray filled will water under where the meat will be, and another above the hot coals.  I've used this a couple of times now with great results.  However, if using a remote thermometer, position the grill thermometer to get an accurate reading can be tricky.  I think I just need to mount it near the one on the lid of the barbecue.  Having the remote thermometer probe permanently in the meat does help in not prodding too many holes in it and losing precious moisture.

Get the barbecue/smoker going at 110°C (around 225°F) and put on the brisket, close the lid, and keep and eye on your temperatures.  You need to maintain the same temperature for about 12 hours.  Unless you see the barbecue is not smoking when you think it should be, or the temperature gauges have gone way high or low, then you shouldn't be tempted to open it at all.

As many websites will say, once the temperature of the thickest part of the meat reaches 70°C, the heating will 'stall', literally for hours as some of the moisture evaporates.  Depending on the age of your beef, etc., at this point, you might want to wrap the brisket in two layers of foil and return to the grill/smoker.  With a properly aged piece of beef, or a well regulated smoker, than might not be necessarily, but if you're short of time, and don't mind not having a great bark, then wrap away.  Also, if you have issues towards then end of your smoke and the meat loses temperature, wrapping with foil can help out to get it up to the 84-88°C you want before you take it off the heat.

Once the meat gets to between 84-88°C, if it's not already wrapped in foil, wrap it in at least 2 layers of reasonably heavy foil, then wrap a couple of towels around that, and leave it for at least an hour (I normally leave it two).  Then unwrap it, lift it out of the foil onto a chopping board, and pour the juices out of the foil, either into your pre-prepared barbecue sauce, into a separate jug, or just straight back over the meat.  Depending on the result, sauce may not be necessary.

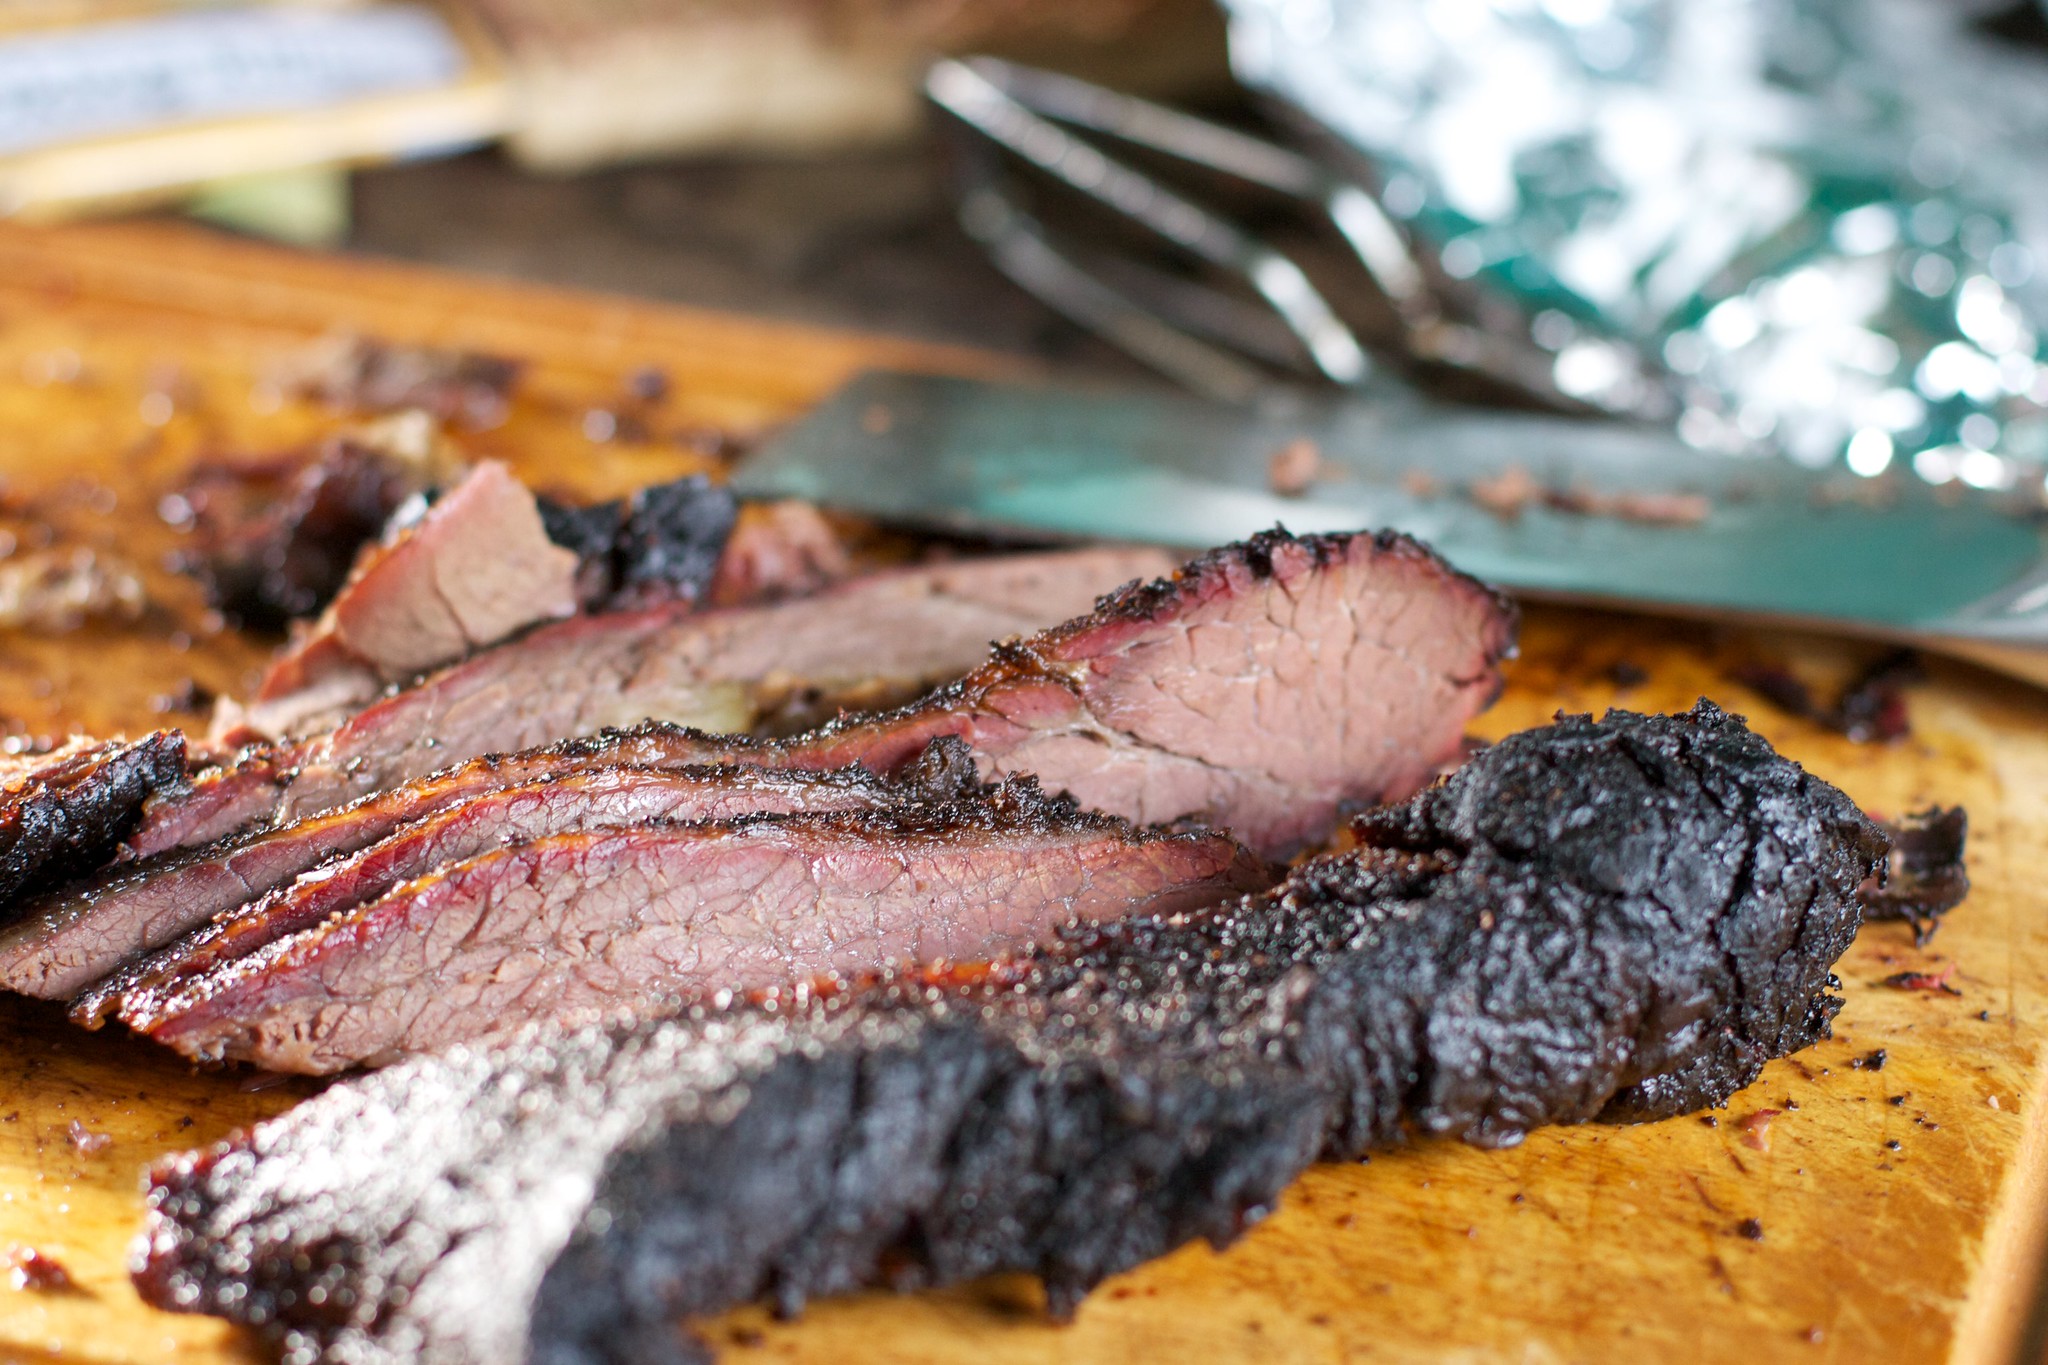
The two pieces of meat in the packet cut should separate easily at this point, so pull them apart so that you can carve them separately.  If it's not immediately obvious which way the grain is in the meat, cut off a corner to see, then carve the whole thing into slice that will stay mostly together, but will almost melt in the mouth when eaten.

I understand why people have electric smokers now, but still, it's nice to get at one with your coals and grill.


And within about 10 minutes...


Sunday 3 July 2011

Mini Lemon Meringues

I'm a big fan of James Martin, especially his cake recipes, and have made his Lemon Meringue recipe a few times now, always with good success.   This time, I wanted to utilise my new tartlet tins, and try and doing some mini ones, and try and hone my meringue piping skills a bit at the same time.  The couple of times I've tried piping meringue in the past it has been a complete failure, and I've ended up trying to rescue it with a palette knife afterwards.  This time, everything went a little more according to plan, and the finished meringues looked half decent and definitely went down well with those who tasted them.

To get the recipe, head over to James Martin's at the BBC website.  Instead of the pastry recipe given here, I used some Pâte Sucrée pastry cases that I had already made for my Strawberry and Chocolate Tartlets.  I also halved the amount of Lemon Curd filling, and Meringue.  In all, this made about 24 mini Meringues, on 5-6cm tartlet cases.  Bake for about an hour in a 160°C oven.

Strawberry and Chocolate Tarts


Since I bought the Michel Roux "Pastry" book, I've wanted to have a go at some of the fruit tart suggestions, especially the cute little ones that are easy to share about.  I'd made a full sized Strawberry Tart from the book before, and wanted to try a variation, adding chocolate to the Crème Pâtissière, and putting them all in mini pastries.  

I bought a bulk load of cheapish 5.1cm Tartlet Tins, then later bought a second bulk lot once I released that they also make far more convenient liners when blind baking.  So if you're thinking about buying lots of small tartlet tins for pastry usage, buy double the amount that you think you'll need at once, so that you can easily line them all.  You can get away without lining them, or you 'could'  line them with baking parchment and baking beans (not something I'm ever going to do when they're that small and making so many, just washing them up is bad enough).

For about 60 or so 5-6cm Pastry Cases

Recipe for the Pâte Sucrée

  • 250g Plain Flour
  • 100g Icing Sugar, sifted
  • Pinch of Salt
  • 100g Butter, cubed
  • 2 Large Eggs

Mix together the Flour, Icing Sugar and Salt, then blend with the Eggs and Butter, for me, idealising using a Pastry Blender.  Knead it couple of times to get a nice ball of dough, then divide into two, flatten into a couple of inch-thick patties, cover in cling film, and refrigerate for at least 30 minutes.

Once chilled, preheat your oven to 180°C, grease your tartlet tins, then remove a patty from the fridge and roll out until about 2-3mm thick.  Then out your pastry for the cases using a 7cm Pastry Cutter.  Chill in the fridge for another 20 minutes, then prick with a small fork, and line each one with an empty tin.  Bake in the oven for 15 minutes, then remove the liners, and bake for a further 5 minutes.  

Leave to cool in the tins for a few minutes before removing to cool completely on a wire rack.  Once completely cool, store in a cake tin until needed.

Repeat until you've used all the pastry.

Recipe for the Chocolate Crème Pâtissière filling

  • 4 Large Egg Yolks
  • 85g Caster Sugar
  • 25g Plain Flour
  • 330ml Milk
  • 1 Vanilla Pod
  • 50g Dark Chocolate, chopped into chips
  • Icing Sugar for dusting
  • 400g Strawberries, hulled and halved

Whisk together the Egg Yolks and a third of the Caster Sugar until you get a ribbon consistency, then whisk in the Flour.  While you're doing this, bring the Milk to the boil in a pan, along with the rest of the Sugar, and the Vanilla Pod, split lengthways.

When the Milk comes to the Boil, carefully pour into the Egg Yolks, whisking continuously, then return the mixture to the pan, and continue stirring until thickened.  Pour back into a bowl, add in the Chocolate Chips and stir until completely melted and mixed.  Dust the top with Icing Sugar, and leave to cool completely before refrigerating.

The Pastry and the Crème Pâtissière and be made in advance, but you really want to avoid putting them together until just before you plan to serve them, to avoid the pastry going soggy.  Put about a teaspoon or so of Crème Pâtissière into each pastry case, then top with a few Strawberry Halves.  Finally, you could dust with a little more Icing Sugar. 

Bacon and Asparagus Quiche


Quiche is definitely a family favourite of mine.  I love my mother's quiches, most of the time, once I realised how simple they are to make, I've had a go at a few myself.  With Asparagus in season, I decided to make pretty much a Quiche Lorraine, but with the addition of Asparagus.

Most times when I've cooked quiche, I've tended to blind-bake the pastry first, then fill and bake again.  However, a foodie friend of mine said that he never bothered, especially as you're cooking for 45 minutes.  Having tried one of his quiches, without soggy pastry, I've decided to give this a try myself on the last couple of occasions, and I have to say, he's pretty much right.  I suppose, if you have the time, and you want to blind bake the pastry first with a quiche, it does no harm, but it not 100% necessary.

For the Short Crust Pastry

  • 100g Butter, cubed and chilled
  • 200g Plain Flour
  • 1 Egg
  • Pinch Salt
Mix the Salt with the Flour, add in the Butter, and blend until you have Petit Pois sized crumbs of butter.  Lightly beat the Egg and add to the mixture and combine to form a dough.  Add a tablespoon of water if the mixture is too dry to form a dough patty.  Wrap in cling film and leave in the fridge for at least 30 minutes to chill.

Once chilled, roll out to about 3mm thickness, then line a greased 24cm Flan Dish, and put back into the fridge to chill.  At this point, you could prick all over with a fork, line with baking parchment, fill with baking beans, and bake in a 180°C oven for 15 minutes.  Or you could leave that step out.  Phillip would leave it out.  I'm undecided.

For the Filling

  • 200g Free-Range Bacon Lardons
  • 1 Large Onion, finely chopped
  • 450g Asparagus, chopped to 5cm pieces
  • 150ml Creme Fraiche
  • 50ml Milk
  • 5 Large, Free-Range Eggs
  • 200g Gruyere Cheese
  • Freshly Ground Black Pepper
  • Freshly Grated Nutmeg
Once you pastry is ready to use, drop the Asparagus into a pan of boiling water for couple of minutes minutes, then cool down immediately in cold water.  Keep the tips separate, so that you can arrange them nicely at the top towards the end of the assembly process.

Gently fry the Bacon Lardons in a dry pan.  If it releases some additional water, wait until this has evaporated and then add the onion, continue to fry in the fat released from the Bacon until softened and translucent.

In a small mixing bowl, whisk the Eggs with the Creme Fraiche and Milk.  Add a good helping of Freshly Ground Black Pepper.  Pour in the Bacon Lardons and Onion.

Put half of the grated cheese in the bottom of the prepared pastry in the flan dish.  Add the non-tips over the cheese.  Pour in the Egg, Creme Fraiche, Milk, Bacon and Onion mixture.  Arrange the tips over the top, so that they're still mostly submerged.  Put the remainder of the grated cheese over the top, along with the grated Nutmeg.

Bake in a pre-heated 180°C oven for around 45 mins.

Saturday 10 July 2010

Cherry and Coconut Flap-Jack

Flapjacks seem to be everywhere these days, but none of them ever seem to be close to the texture and flavour of the ones my Grandmother used to make. After doing a bit of searching on the web, I found some recipes which got me close to the ones she used to make. So easy to make, it's hardly even baking.

On the whole, my Grandmother's flapjacks would be the plain variety, and this recipe, without the Cherries and Coconut comes pretty close to how I remember them. However, since trying various commercial flapjacks, one combination that I like, even though it just wasn't a real flapjack, was Cherry and Coconut, and so this recipe is my interpretation, whilst trying to keep them nice and chewy at the same time.

These have been a hit the office and pub on a few occasions, although when I tried to do a dairy free version using Soya Butter for one of the guys, it really didn't work as well at all. The taste was OK, but they seemed to fall apart. More the texture of a commercial flapjack, than one that I remember as a child.

Recipe for Cherry and Coconut Flapjack

  • 130g Unsalted Butter
  • 80g Granulated White Sugar
  • 40g Demerara Sugar
  • 2 tablespoons Golden Syrup
  • 1 tablespoon Honey
  • 300g Porridge Oats
  • 70g Desiccated Coconut
  • 200g Glacé Cherries (halved)
Gently melt the Butter, Sugars, Syrup and Golden Syrup together in a pan until you have a smooth mixture. In a bowl, mix the Oats and Coconut and Cherries, then mix in the Butter/Sugar mixture.

Line a tray (or in my case, Lasagne dish) with baking parchment, then add in the flapjack mixture, and flatten out. Bake in the oven at 180°C for about 30 minutes, until the top is nicely golden.

Leave to cool before removing from the tin. Use a sharp knife to cut into squares, ensure to wipe the blade between slices to help make each slice clean.

Sunday 4 July 2010

Banana and Strawberry Loaf Cake


These days, I like to eat my bananas when they're still a little green. Once they're much past that, I need to find some other way of eating them. When looking around at Banana Bread recipes, I found a couple that also added strawberries, and with them in season right now, I thought it was definitely worth giving that a try.

The cake definitely went down well with most people that tried it. The strawberries seem to add a little extra moisture as they sort of disintegrate to a certain extent, plus the cake was fairly light. So that the texture isn't too open, I suggest cubing the strawberries that you mix directly into mixture fairly small, then just keep a couple of good looking strawberries back to slice and put on the top before putting in the oven.

Some recipes suggested adding sour cream to keep the cake moist too, however, as one of the guys in the office is allergic to dairy, I decided to leave that out and use Soya Butter too. I may try one day with Sour Cream too, although from a moisture point of view, I don't think this recipe needs it.

Recipe for Banana and Strawberry Loaf Cake

  • 50g Soya Butter or Unsalted Butter
  • 80g Granulated Sugar
  • 2 Eggs, beaten
  • 1 teaspoon Vanilla Essence
  • 2 teaspoon Ground Cinnamon
  • 1 teaspoon Ground Ginger
  • 1 teaspoon Baking Powder
  • Half teaspoon Bicarbonate of Soda
  • 3 Large Ripe Bananas, mashed
  • 1.5 cups of Plain White Flour
  • 1.5 cups of Fresh Strawberries, cut into smallish pieces

Preheat the oven to 180°C. Beat Sugar and Butter together in a bowl until smooth. Add the beaten eggs and mix together. Add the Vanilla, Cinnamon, Ginger, Baking Powder, Bicarbonate of Soda and mix. Mix in the mashed Banana and Flour until you have a smooth mixture, then finally add most of the strawberries, keeping a few back to drop on the top if there are none showing after you pour the mixture into the loaf tin.

Pour the mixture into a greased 400g (half pound) loaf tin (lining with some baking parchment makes it really easy to extract afterwards). If there aren't any strawberries showing on the top, drop a few of the reserved ones on the top and half poke then in, so that you get a nice display of them on top when it's cooked.

Put in the oven for 45 mins, then lower the temperature to 160°C for another 45 minutes. You should probably check it with a skewer after about an hour's total cooking time, but for me, 45 mins at 180° followed by 45 mins at 160°C works perfectly, and still results in a nice moist cake. Leave to rest in the tin for a few minutes, then carefully transfer to a wire rack to cool down.

Monday 10 November 2008

Lancashire Hotpot

Having seen some good looking, cheap, lamb neck chops in my local 24 hour butcher on Friday night, and the cold weather really suggesting good, traditional, comfort food, I decided on making my first Lancashire Hotpot.  I could think of nothing better to have after an afternoon and early evening of watching international rugby.

This is definitely a satisfying, and pretty cheap dish to prepare, especially for those who are feeling the credit crunch.  As I discovered, lamb neck is about half the cost of some other cuts, and having seen it as the ingredient of choice when looking at Lancashire Hotpot recipes in the past, I put off making it no longer.

Most recipes I’ve seen for Lancashire Hotpot include Lamb Kidneys in the ingredients.  There are a few ingredients that readers are unlikely to see included in recipes on this site, and Kidneys are one of them, but feel free to add a few yourself if you are partial to them.  I’d actually meant to get some black pudding to substitute for the Kidneys, but, as with most of my cooking experiences, this was the ingredient which got away.  Cooking for me is a bit like any mechanical task in that there’s always a spare washer/screw/ingredient, left over when I’m finished.  But then, if the car still runs/computer hasn’t blown up/food tastes fine, it doesn’t really matter, does it?

Carrots definitely seemed an optional inclusion too, although as we had some to go with it anyway, and they helped fill in a few gabs in the layers, I thought it was worth sticking a few in.


Lancashire Hotpot Recipe (serves 4)

  • 8 Lamb Neck Chops (about a kilo)
  • 2 Large Onions, chopped
  • 1 kilo King Edward Potatoes (peeled and thinly sliced)
  • A handful of Chantaney Carrots (optional)
  • A small glass of Red Wine
  • A few sprigs of Fresh Thyme and Rosemary (leaves only, finely chopped)
  • 1 Pint of Lamb Stock
  • Salt and Freshly Ground Pepper
  • 1 tablespoon Plain Flour
  • 30g Butter

First, season the Flour in a bowl with Salt and Pepper, then mix the Lamb Neck Chops in the Flour to give it a light coating.  Heat up a little of the butter in a pan with a little vegetable oil, and lightly brown each piece of Lamb and set aside.  If you are using Kidneys or Black Pudding, you should lightly brown these now as well and set aside.  Next add the Onions, adding a little more Butter if the pan is becoming dry, and cook these for about 5 minutes to soften.  Then add the fresh Herbs and the Wine, and reduce until it becomes a bit syrupy.  Pour in the Stock, season with Salt and Pepper as necessary and bring to the boil.

Now, lightly grease the pan or deep casserole you are going to make the hotpot in.  Put a lining of Potato slices at the bottom of the pan, then a layer of 4 overlapping Lamb Chops, maybe a few Carrot pieces and onions from the stock.  Add another layer of Potato slices, with the remaining Chops on top, a few Carrots, etc, then, pour the stock over the top.  Melt the remaining Butter in a small pan, and use it to brush over and between the last layers of sliced Potato which top the hotpot. 

Cover, and put in a 170 degree Celsius oven for about one and a half hours.  After this time, uncover the pan, brush a little more melted butter over the top, then cook, uncovered, for about 45 minutes until the top is golden.  Serve with some seasonal vegetables of your choice.

Monday 27 October 2008

Gong Bao Ji Ding (Kung Pao Chicken and Peanuts)


I’ve always been a fan of Chinese food, but until recently, I had never really tried very hard to make it.  This was partly because I only recently got a Wok which works on my stove, and partly due to a friend of mine saying that even if you find the right ingredients in London, it will never taste the same as it does in Beijing.  Perhaps that is once reason why I have never tasted anything remotely like it in a Chinese Restaurant in the UK.

This Chicken and Peanut dish always seemed to be a popular choice in Beijing, especially in some of the Sichuanese restaurants we tended to visit.  The Sichuan Peppercorns tend to have a bizarre, mouth-numbing effect, that definitely seems a bit strange when you first try them, but which helps with the heat of the Sichuan Peppers.  This is definitely a taste sensation that everyone should try at least once in their lives.

Part of the inspiration for making this came from reading the recipe at Rasa Malaysia, one of my favourite food blogs.  The recipes and photography definitely make subscribing to the RSS feed well worthwhile for the occasional inspiration, however, the recipe here doesn’t include Sichuan Peppercorns, and so I had to look elsewhere for a recipe which included them.  It’s also worth checking out the Ma La Crayfish photo, and if you ever order it in Beijing, try and make sure you get latex gloves to eat it with if you want to be able to touch any sensitive areas of your (or anyone else’s) body in the next 24 hrs!  It takes a lot of hand-washing to get the Chilli off your hands.

For me, the most important ingredient in this recipe is the Sichuan Peppercorns, as without them, I don’t think it would quite re-awaken the memories of the dish I enjoyed in Beijing so many times.  They’re not the easiest thing to find, although a trip to my local Wing Yip found pretty much everything required.  The ones I bought were definitely not as potent as the ones in Beijing, so it is probably worth using the upper amount in this recipe.

This recipe literally takes minutes to cook, so personally, I like to have everything prepared beforehand so that I’m not looking for stuff while I’m cooking.  It’s also worth trying to getting quite thick spring onions, rather than the thinner, salad variety, as you then get nice chunks of spring onion, about the size of the chicken pieces, rather than weedy little bits.  The Chillies should also be of the Sichuanese variety.  They had sold out of these in Wing Yip, and the ones I got as an alternative were really too big and although tasted alright, for me, they were too mild for this dish.


Recipe for Gung Bao Ji Ding (serves 2)

  • 2 Chicken Breasts (cut into 2cm cubes)
  • 6-10 Spring Onions (white parts only, cut into 2cm pieces)
  • 3 Cloves of Garlic (thinly sliced)
  • 2cm piece of Ginger (thinly sliced)
  • Half cup or so of Peanuts (roasted, unsalted)
  • 1-2 teaspoons Whole Sichuan Peppercorns
  • 10 Dried Red Chillies (seeded and cut into 2cm pieces)
  • Groundnut Oil, for stir-frying

For the marinade
  • 2 Teaspoons Corn Flour
  • 2 Teaspoons Light Soy Sauce
  • 2 Teaspoons Shaoxing Rice Wine

For the sauce
  • 1 Teaspoon Corn Flour
  • 1 Teaspoon Chinkiang or Black Rice Vinegar
  • 1 Teaspoon Light Soy Sauce
  • 1 Teaspoon Dark Soy Sauce
  • 1 Teaspoon Sesame Oil
  • 1 Tablespoon Water
  • 2 Teaspoons Sugar

Mix the cubes of Chicken with the marinade, and keep in the fridge for about 30 minutes or so.  Heat up a couple of tablespoons of Groundnut Oil in a wok until it’s nearly smoking, then add the Whole Sichuan Peppercorns and Dried Chilli pieces and stir until the oil is fragrant.

Next, stir in the Chicken pieces, and when they’re all separated, stir in the sliced Garlic and Ginger.  Stir fry for a couple more minutes, then add the spring onion.  After about another minute, pour in the sauce and ensure that everything gets a good coating before finally adding in the peanuts.  Give it a quick stir so that the peanuts also get a coating in the sauce, and serve immediately.

Serve with Rice, e.g. Thai Fragrant Rice. 

Tuesday 23 September 2008

Hara Shorva (Green Soup)


I’d be planning on making some kind of pea soup for a couple of weeks, and when I stumbled upon the recipe for Green Soup in Madhur Jaffrey’s Illustrated Indian Cookbook, it sounded well worth a try. My only complaint with Madhur Jaffrey’s book is that many of the ingredients are measured by weight, and personally, I don’t tend to weigh anything (including myself), instead, I tend to go by rough volume for the various ingredients. So in choosing the potatoes to use, rather than going by the kilo weight that was suggested in the recipe, I just chose two huge baking potatoes, that I decided would take less time peel and cube for the soup.

I also skimped slightly on the amount of salt, and added some black pepper, as there is very little that I don’t add black pepper to.

The only other deviation I made from the recipe was with the Ginger. I put the thumb-sized piece in without a hitch. However, the recipe said to remove it after the first 30 minutes of cooking, something I forgot to do, and so it got blended with the other ingredients a bit later on. To be honest, I don’t think it spoilt the flavour at all. There was definitely a noticeable Ginger flavour, but it didn’t overpower the others. I suppose it depends on how much you like Ginger, and of the people who tasted it, nobody seemed to be complain.

Recipe for Green Soup (serves 4-6)


  • 2 huge Baking Potatoes (peeled and cubed)
  • 1 large Onion (roughly chopped)
  • 2 inch thumb of Ginger (peeled)
  • 2 pints of Chicken or Vegetable Stock
  • Half teaspoon Ground Coriander
  • 2 teaspoon Ground Cumin
  • Half a Hot Green Chili, finely chopped
  • 4 tablespoons of Fresh Coriander, finely chopped
  • 1.5 cups Peas (fresh or frozen)
  • Half teaspoon of Salt
  • 1 teaspoon Pepper
  • 1 tablespoon Lemon Juice
  • Half cup of Double Cream

Put the Potatoes, Onion, Chicken Stock, Ground Coriander and Ground Cumin into a large pan, bring to the boil, then simmer for 30 minutes, so that the potatoes are cooked. Add the Chili, Fresh Coriander, Peas, Salt, Pepper and Lemon Juice, bring back to the boil, then simmer for a further 5 minutes. Once the peas are cooked, remove from the heat, then blend until smooth (personally, I used my usual hand-blender). Stir in the Double Cream while gently reheating and serve immediately.
Related Posts Plugin for WordPress, Blogger...